How to create term base in a CAT tool (tutorial)
Olena Micovčinová 16.06.2022 For Translators Reading time: 7 min.
You probably already heard about the term base. Term bases, i.e. term dictionaries, are great helping tools by translation from any field.
In the previous article, we wrote about main advantages of term bases. We might mention easier and more effective work, improvement of translation quality, assuring translation consistency, and finally improving your vocabulary. And what’s the best thing? Creation of a term base is a piece of cake!
There are several ways of creating a term base. The basic option is to create a table in Excel and look up the needed terms “manually”. Even easier is to create a term base in a CAT tool which automatically offers the terms during translation. If you are interested in this option, read on. We have prepared a short guide for a creation of term base in memoQ.
Term base creation in memoQ
You can create a term base in two different places:
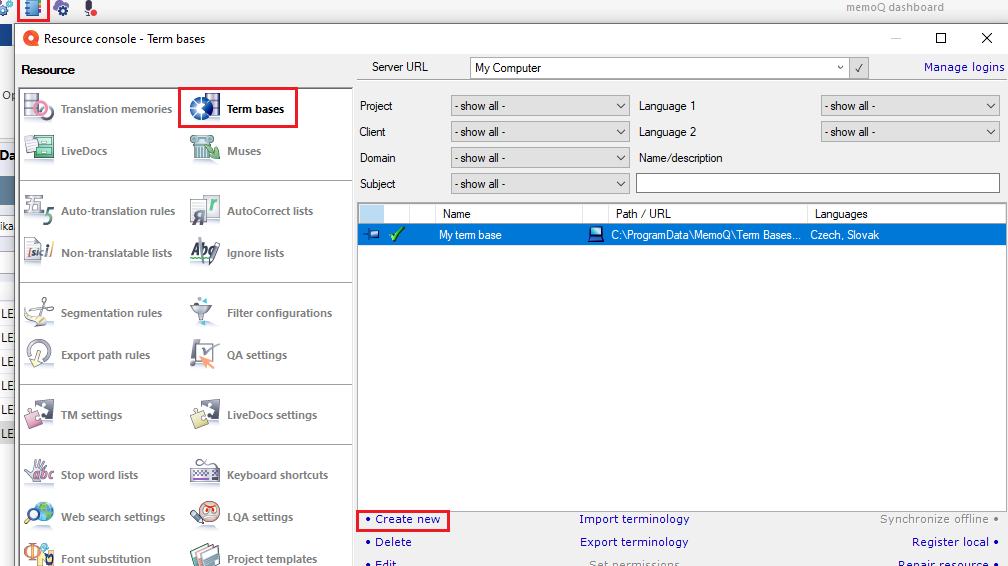
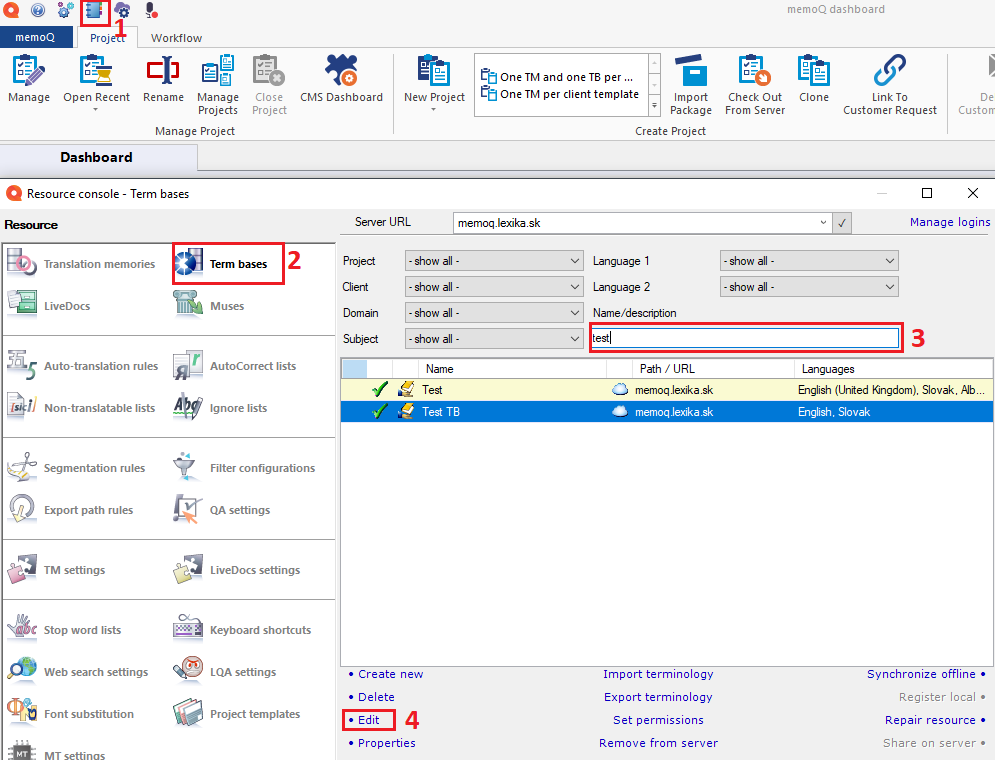
1. In general, open the Resource Console ![]() (in the upper left corner), go to Term base and click on Create new in the bottom part of dialogue box.
(in the upper left corner), go to Term base and click on Create new in the bottom part of dialogue box.
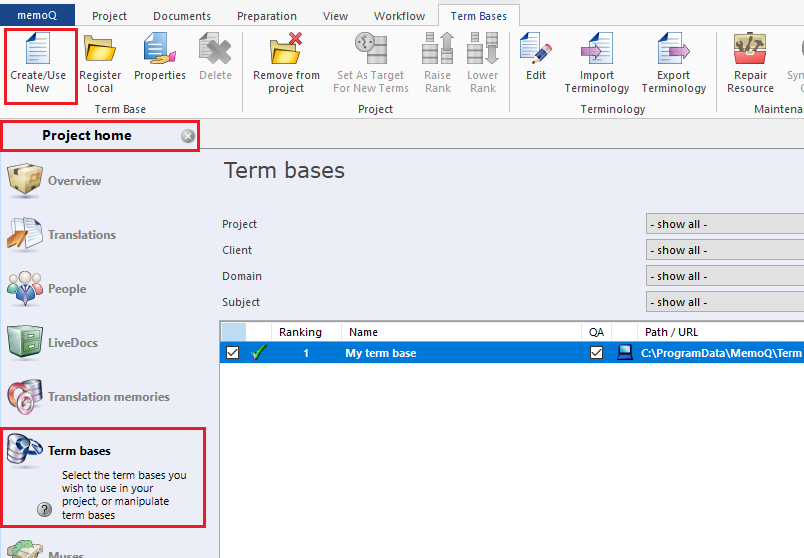
2. To create a term base in a project, go to Term base tab and click on the Create/Use New button.
A dialog box with settings appears:
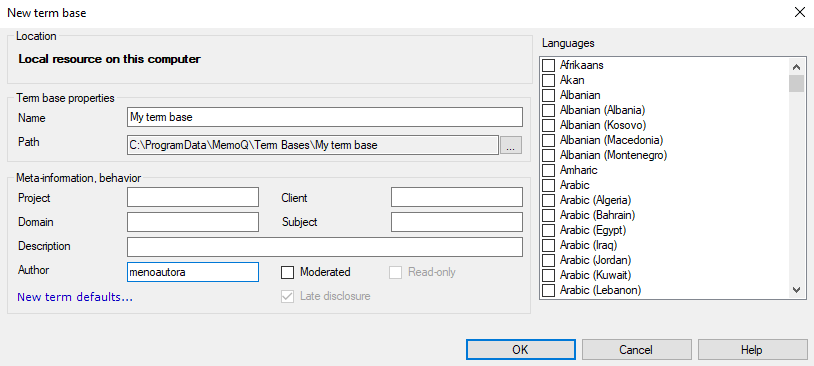
- Name: name your term base
- Path: you can change the default destination folder
- Meta-information, behaviour: this is additional information for more detailed characteristics of the term base.
- Project = usually used for the order number (in your records)
- Client = name of the client
- Domain = topic or genre of the source text
- Subject = subject matter of the source
- Description = detailed information about the project
- Author = name of the user
- Moderated = this option serves for “filtering” of useless terms. This is used with memoQ server if there are more translators working on the same project where every one of them adds terms into term base. An authorized person checks and approves all the added terms. Only then they become visible to the other users.
- Late disclosure = after ticking this field, the selected term is immediately shown in the term base.
- Languages: the source and target languages need to be selected. If you are creating the term base from a project, they are selected by default. Term base is a multi-lingual resource, you can add as many languages to it as you need to.
- New term defaults = this sets a term base to be able also to capture words which are grammatically declined or written specifically in lowercase or capitals.
We recommend filling in as many fields as possible, so that in the future it will be easier to find the term base you want to use in your project.
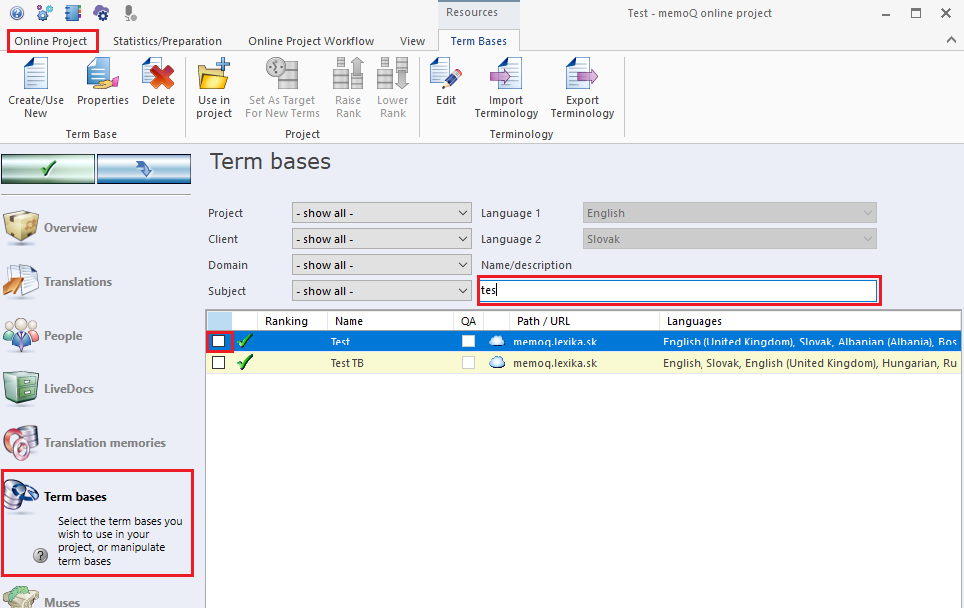
Finally, click the OK button and you have created and added the term base to your project. In this tab, you will see all the available term bases with the same language combination as your project. You can add as many as you want to, just tick the box next to the name.
If you add more term bases, numbers will appear in the Ranking column. They indicate the priority use with 1 being the most important term base – the higher the number, the lower the priority. If memoQ finds the same term in two term bases, the first hit will come from the term base ranked 1. If you wish, you can change the ranking at any point during translation.
Modification of existing terms and addition of new ones
If you’d like to add new terms or modify the existing ones, go to Resource Console, click on Term bases, then right-click the term base you are about to update and choose Edit.
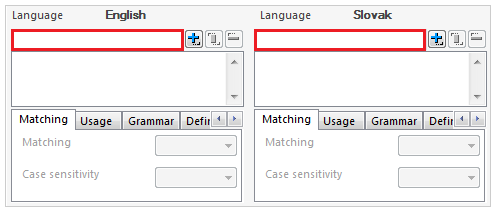
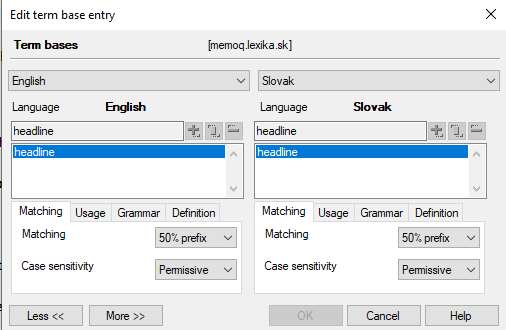
The editor for adding and modifying terms will display.

If you have a multilingual term base, choose your working language pair (Language 1 – Language 2).
Note: It is possible that for some terms, some of the columns will stay empty – this means that the given terms are defined in another language pair.
To add a new term, click on New on the dashboard.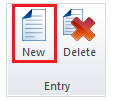
Type the term into the field for the given language in the lower part of the screen and click on ![]() .
.
For modifying an existing term, choose it from the list below, update it and click on ![]() .
.
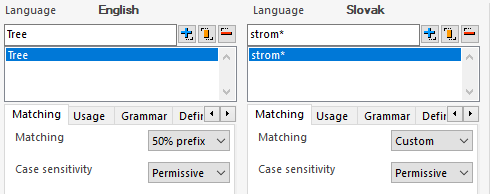
You can also add several translation options for a single term. Type the second option into the field of the given language and click on ![]() which adds a new line.
which adds a new line.

In case you make a mistake, you can easily delete the term by clicking ![]() . For deletion of the whole entry from the term base, click on the Delete button on the dashboard.
. For deletion of the whole entry from the term base, click on the Delete button on the dashboard.

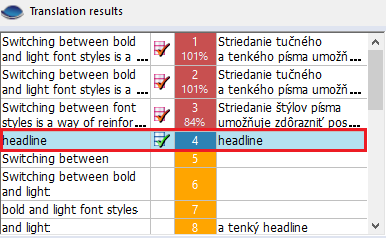
The term base can also be modified directly in the project. Term base hits are marked blue in the Translation results.
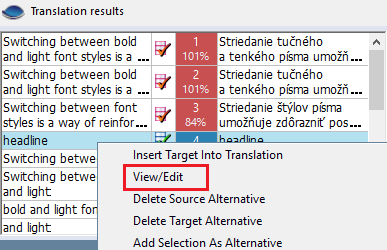
Right-click the term that you want to edit and click on View/Edit – a simplified editor will appear.
Now you just follow the same steps as described above.
Export/Import Term base
After the successful term base creation, you can use it continuously. In addition to modifying it or adding new terms, you can also export or add the term base to another CAT tool if needed.
If you already have a prepared term base, e.g. in MS Excel as mentioned above, you don’t have to worry about manually adding it to memoQ again. You can easily import it.
How can I export a term base from memoQ?
memoQ offers three export formats:
- CSV (text file with comma-separated values)
- XLSX (similar to CSV, but values are stored in columns)
- MultiTerm XML (files can be imported into SDL Trados MultiTerm)
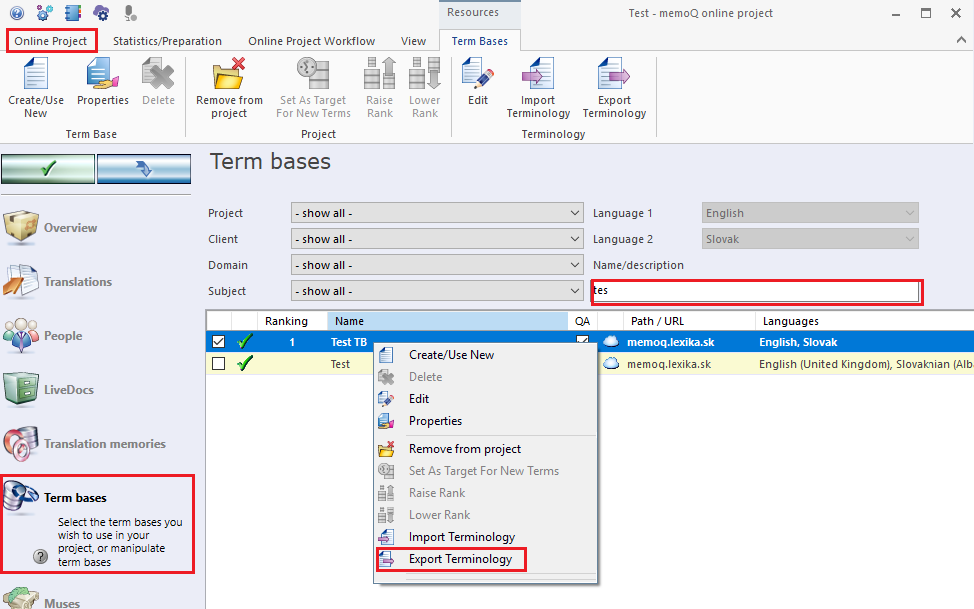
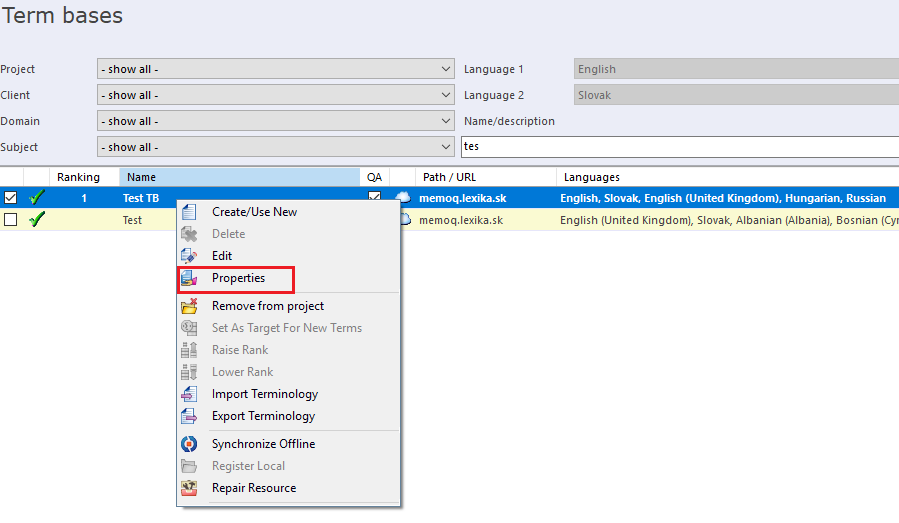
Go to Resource Console and click on Term bases. Find the term base in the list, right-click it and choose Export Terminology.
A dialogue window with settings appears:
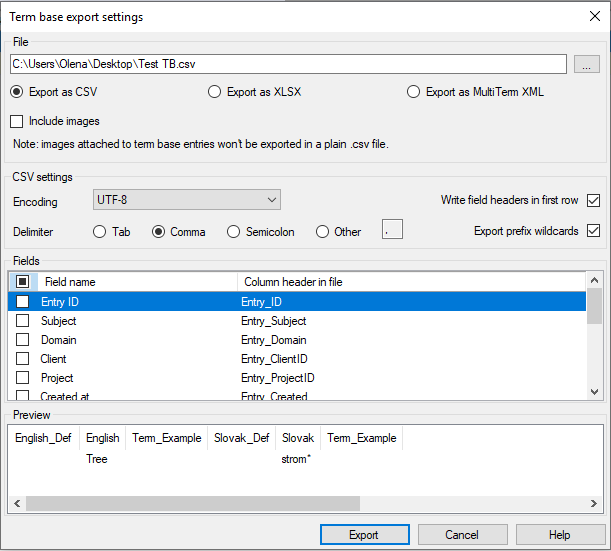
- File = destination folder in your PC
- Export as... = options for export
- Fields = information that can be included in the export (for a simple output, we recommend: Entry ID, Term definition, Term text (with wildcards)and Example of use.)
Click on Export to download the term base.
How can I import a term base to memoQ?
For term base import, follow the same steps as when exporting, but choose Import Terminology. In memoQ, you can import term bases in various formats, such as CSV, XLSX, TMX or Multiterm. The dialogue box which pops up differs according to the format. As an example, here is an import of an XLSX file:
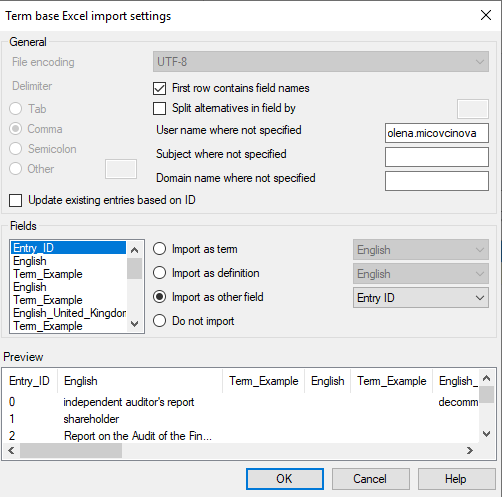
In Fields, memoQ displays a list of all columns in your Excel file. Here you define what memoQ should do with them, e.g.
- Import as term = this means that the column contains terms and you choose the language
- Import as definition = this is suitable for the column regarding your notes or closer explanation
- Do not import = in case you import a column by mistake, you can simply exclude it from you term base
To confirm your settings, click OK.
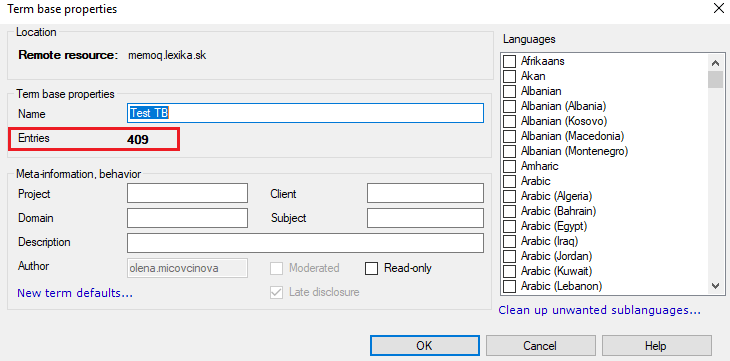
If you want to know the number of terms in your term base, right-click the term base, and then choose Properties.
The number of terms is given in the Entries line.
We have illustrated here only the basic methods of managing term bases in memoQ. memoQ certainly offers many more ways of processing and managing term bases, including setting forbidden terms, defining terms, etc. This makes the work of translators and translation agencies even more effective. So put away the unnecessary papers and pens, and dive into the world of CAT tools to speed up your work.

After graduating, I did not have a clear idea of what to do next. But what I knew was that I wanted to go to work with a smile on my face and do something that would make me happy. All my job expectations were met after joining LEXIKA in 2016. I work as a project manager and my day-to-day duties include overseeing specialized translations, interpreting projects, and occasionally even certified translations. I am constantly in touch with our translators, our clients, and other translation companies thanks to which my work is always dynamic and interesting.
Share it!